
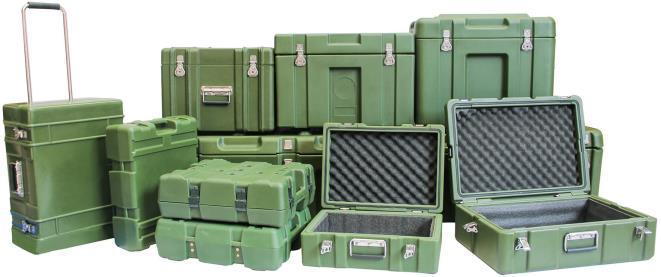
Custom foam inserts for cases have a simple job on paper: keep a kit organized inside its case. The real design question is harder. Your insert must support equipment with different shapes, leave room for hands and cables, and still make sense when someone opens the case at a busy jobsite. Pick-and-pluck foam can be useful when the kit is still changing. CNC-cut foam can give a defined equipment set a more repeatable layout. The right choice depends on what you carry, how often the layout changes, and what you need to approve before production.
What a Case Foam Insert Needs to Do
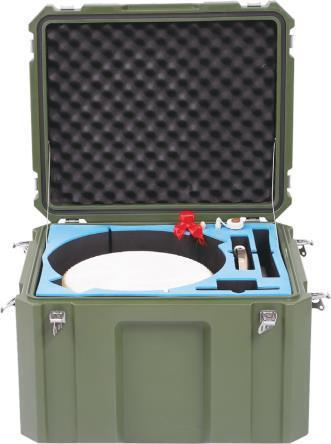
An insert isn't just a collection of holes. It connects the case shell to the way the equipment is stored, counted, removed, and returned.
Hold, separate, and support the complete kit
Start with the whole kit, including the unglamorous pieces. A test instrument may travel with probes, adapters, batteries, a charger, and printed instructions. A field repair set may include tools that look similar but serve different jobs. If the brief covers only the main device, the remaining pieces tend to be squeezed into leftover space.
Each item needs a defined position. The layout should prevent loose parts from sharing a cavity when their surfaces, controls, or connectors could contact one another. It should also make missing items easy to spot. That last point matters for a tool box foam organizer used by a team: a clear empty position is often more useful than a crowded compartment.
The case comes first, too. Buyers comparing plastic protective cases and rotomolded equipment cases should review the usable interior of the selected format before fixing the foam drawing. Wall shape, lid space, handles, hardware, and the way the case opens can all affect the area available for equipment.
Plan for removal, cables, and future accessories
A snug outline can look tidy and still be awkward to use. Ask how a person will lift each item. A finger recess, grip area, or suitable orientation may matter more than squeezing one more accessory into the drawing. Protect vulnerable controls and connectors, and don't make a cable bend simply because it fits that way in a flat sketch.
You should also decide whether the kit is stable. If accessories are still being chosen, a fully fixed layout may arrive too early. If every production kit contains the same approved components, a repeatable layout becomes much more valuable.
Material choice is another project decision. Foam families and grades differ. For example, the Zotefoams Plastazote material page describes products used in industrial packaging and points buyers to grade-specific information. That example shows why “foam” alone isn't a complete specification. It doesn't mean that a particular material or brand is standard in an IFSTAR case.
Pick-and-Pluck Foam: Strengths and Limits
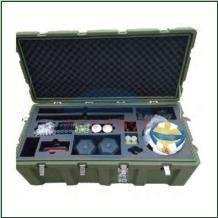
Pick-and-pluck foam is pre-scored so a user can remove small sections by hand and shape cavities around equipment. It works well when speed and flexibility matter more than a production-perfect appearance.
Fast setup for prototypes and changing kits
For a one-off kit, a demonstration set, or an early prototype, hand-configurable foam lets you test an arrangement without preparing a finished cutting file. You can place the items, check their order, and revise the cavity while the equipment list is still moving. It can also be practical when a buyer needs to organize common tools and can accept a manually prepared result.
This flexibility has a boundary. Removing material is easy; putting it back cleanly isn't. You still need to plan the layout before pulling cubes. Place the largest and heaviest items first, reserve positions for accessories, and check how much foam remains around each cavity. There is no universal safe spacing figure. The required support depends on the material, item geometry, weight, case, handling environment, and validation method.
Where hand-shaped cavities become inconsistent
Two people can work from the same equipment list and produce slightly different cavities. Edges may follow the scoring grid rather than the exact product outline. That may be acceptable for an internal prototype. It becomes a concern when multiple kits must share the same presentation, inventory position, or assembly instruction.
Small controls, protruding connectors, and irregular shapes also demand care. A rough cavity that presses on a fragile feature is not improved merely because the rest of the device fits. Before choosing pick-and-pluck foam for a production order, ask who will prepare each insert, what the approved arrangement looks like, and how consistency will be checked.
CNC-Cut Foam: Strengths and Limits
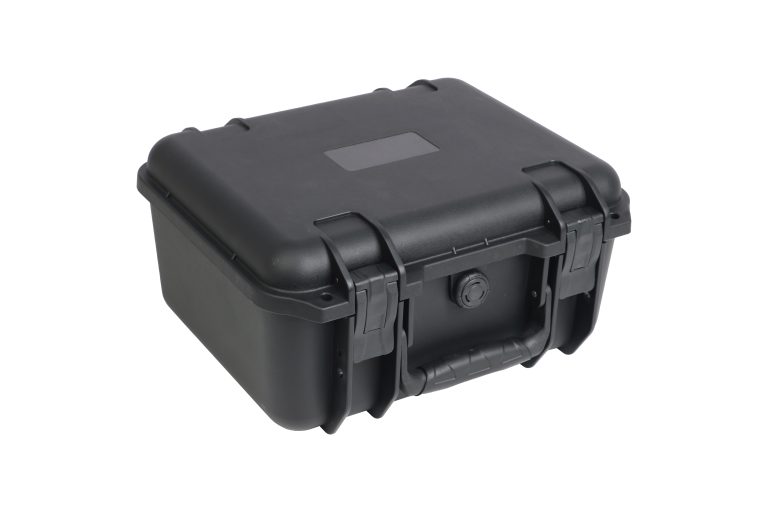
CNC cutting turns an approved digital layout into defined cavities. It is a strong option for an equipment case with custom foam when the item set is known and repeated across multiple cases.
Repeatable cavities for a defined equipment set
A digital cutting plan helps keep cavity position and shape consistent from one insert to the next. It can accommodate recognizable outlines, organized accessory positions, and planned grip areas. The result can also give customer-facing demonstration kits or service sets a cleaner, more deliberate appearance.
Repeatability isn't the same as proven protection. A cutting machine follows the drawing; it doesn't decide whether the chosen foam, support depth, or layout is suitable for the equipment. The selected insert still needs review as part of the complete case system.
That system may begin with a particular case format. For instance, buyers can use the YF-504836 equipment case format or the YF-605050 storage case format as starting points for a discussion. Their pages correctly direct buyers to confirm current internal dimensions and configuration. They do not establish that a pictured model includes a certain foam grade, approved layout, or tested protection level.
Why accurate dimensions and layout approval matter
CNC-cut foam asks more from the brief. The supplier needs reliable item dimensions, including protrusions and parts that move. A drawing or 3D file may help, but the physical item or an approved sample can reveal details that a simple length-by-width-by-height table misses.
Orientation deserves explicit approval. Should a display face up? Can a probe remain connected? Does the operator wear gloves? Which item must come out first? These questions influence cavity direction and access. Confirm the full arrangement, labels or color requirements, and the case model before treating a cutting file as final.
Pick-and-Pluck vs CNC-Cut Foam
The useful comparison isn't “basic versus premium.” It is flexible setup versus controlled repeatability.
| Decision factor | Pick-and-pluck foam | CNC-cut foam |
|---|---|---|
| Initial setup | Can be shaped by hand after planning | Requires an approved digital layout and item data |
| Layout changes | Practical while a kit is still evolving | Changes normally require an updated drawing and approval |
| Cavity shape | Follows the pre-scored structure and hand work | Can follow a defined cut path for the approved geometry |
| Repeatability | Depends on the person preparing each insert | Better suited to repeating an approved layout |
| Appearance | Functional, with visible hand-configured edges possible | More controlled when presentation matters |
| Buyer input | Equipment outline, arrangement, and hands-on fit check | Accurate dimensions, orientation, drawing, and sample approval |
| Best fit | Prototypes, one-off arrangements, or changing kits | Stable equipment sets and repeated case configurations |
Neither column answers the protection question by itself. Foam behavior varies by material and grade. Zotefoams, for example, publishes technical information sheets covering product specifications and different mechanical or environmental properties. Those documents are useful evidence for selecting a named material. They shouldn't be copied into a quotation for an unspecified foam.
The intended distribution environment matters as well. ASTM's packaging standards catalog groups methods related to cushioning materials, packages, and shipping containers. The practical lesson is straightforward: evaluate the actual packaging system against the project's real handling risks. A neat cavity alone isn't a transport qualification.
Foam Density, Thickness, and Item Spacing
Buyers often ask for a “standard density” or a fixed distance between items. There isn't one answer that works for every kit.
Foam density is only one part of material selection. Strength, resilience, cell structure, thickness, layering, surface finish, and compatibility with the item can also matter. A heavy metal tool and a light electronic accessory place different demands on an insert. A sharp edge or projecting knob changes the local loading again.
Thickness must be considered in three directions. The base layer supports the equipment. Side material separates cavities and helps hold items in position. Lid foam or another upper restraint may be used when the agreed configuration calls for it. Too little material can leave weak sections; too much can reduce usable space or make removal difficult. A drawing should show the actual stack, not just the top outline.
Spacing deserves the same project-specific treatment. Don't approve a fixed gap copied from another case. Review the selected foam, the item weight and shape, the cavity depth, and the likely handling conditions. Then inspect a representative sample with the real equipment. Where transportation performance is critical, agree on an appropriate validation plan rather than assuming appearance proves protection.
How to Prepare a Custom Foam Brief
A useful brief lets the case and insert be reviewed together. You don't need polished engineering documentation to begin, but you do need complete inputs.
- List every item. Include the main device, tools, cables, chargers, adapters, spare parts, documents, and optional pieces. Use the site's guide to build the complete equipment list before drawing cavities.
- Record dimensions and weight. Note protrusions, handles, connectors, moving parts, and any measurement uncertainty. State the units clearly.
- Explain orientation and access. Identify the display side, removal direction, fragile surfaces, and the order in which items are used.
- Mark changes that may occur. Separate confirmed equipment from future or optional accessories. This helps determine whether a flexible or fixed insert is sensible.
- Choose the case format provisionally. Review usable internal dimensions rather than relying only on external size. The insert must fit the actual case geometry.
- Describe the project context. Share handling conditions, storage needs, destination, expected quantity, branding requests, and any validation requirements.
- Agree on review evidence. Ask what drawing, material identification, sample, and fit checks will be supplied before production approval.
IFSTAR's custom foam and interior planning starts from equipment dimensions, accessory positions, access, and sample review. Send the complete kit information first. From there, the case format and foam layout can be discussed as one configuration.
FAQ
Q: Is pick-and-pluck foam suitable for a production order?
A: It can be, if the buyer accepts the hand-configured appearance and has a clear method for preparing and checking every insert. For repeated kits that require consistent cavity positions, a CNC-cut layout may be easier to control. Review the real item set and approval needs before choosing.
Q: What information is needed for a CNC-cut foam insert?
A: Provide a complete item list, accurate dimensions, weight, orientation, fragile features, access needs, and the proposed case. Drawings or 3D files can help. The supplier may also need physical items or representative samples to resolve details that aren't clear from basic measurements.
Q: Can a foam layout include cables, chargers, and spare parts?
A: Yes, those items should be part of the first layout rather than added at the end. State whether cables can be coiled, which accessories must stay with a device, and which parts need quick access. Leave room only where a future accessory is genuinely planned.
Q: How should a buyer review a foam insert sample?
A: Check that the approved equipment fits without pressure on vulnerable features, can be removed as intended, and returns to an obvious position. Review the case closure, lid interaction, accessory organization, material identification, workmanship, and any agreed transport validation. Record changes against the same drawing and equipment list before approving production.
The most useful insert is the one designed around a real kit, not a generic cavity count. Send the full equipment list, dimensions, intended use, and expected quantity to review the case and foam layout together.