
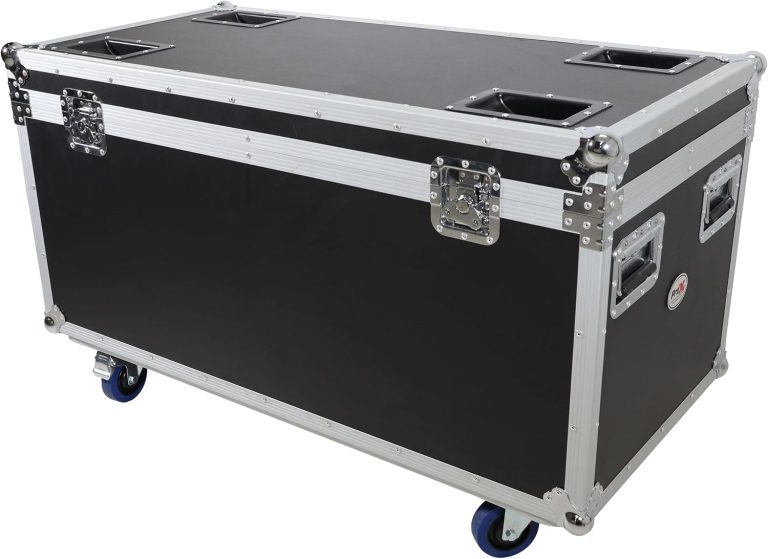
Place an aluminum sample and a molded plastic sample in a meeting room and people form opinions before either lid opens. One reads as presentation equipment; the other suggests field work. Neither impression says what happens to the instrument inside.
The fair comparison uses candidates intended for the same duty. Do not put a light presentation box against a large transport shell and call the result a material test. Give both samples the identical load and route.
Define what the case must control
List the damage and handling problems the case is meant to prevent. These may include outside pressure, knocks during transfer, dust, rain, equipment movement, scratching or loss of small parts. Rank them rather than marking everything “high priority.”
Let the operator take over. Does the lid need to detach? Will controls remain mounted in the base? Can the open case stand on the narrow bench without pushing other equipment aside? Capacity alone does not answer any of these questions.
Describe the route in plain language
“One technician; service van; two flights of stairs; customer desk” is a workable route note. A parcel or pallet job gets a different line. Add the overnight store and any outdoor queue. The word “portable” can then be retired.
The route prevents vague comparisons. “Plastic is better outdoors” and “aluminum is better for display” may be useful prompts, but neither is a specification.
Measure the whole kit
Empty every accessory onto the table: cables, batteries, papers and spares. Measure and weigh them in their packing orientation, then mark the fragile connector or control. The equipment list guide keeps each note with its item.
Plan access space and foam around the equipment. A case chosen from the device dimensions alone is usually too small once fingers and accessories enter the layout.
Compare construction, not material names alone

An aluminum build may combine sheet panels, edge profiles, corner pieces and separate hardware. The plastic body could come from injection or rotational molding. These are families, not one design. The quotation should identify the actual assembly, because that is what the buyer receives.
Request the proposed model’s specification and a representative sample. Evidence for a neighboring construction stays with that model.
Look at edges, corners and panels
Run a hand along the aluminum profiles and corners. Look behind the panel support and inspect the fasteners. Normal pressure on a broad panel shows where it moves. Finish at the edges and joints that hands meet during a lift.
Turn to the plastic sample and inspect its ribs, hinges, latch mounts and rim. Movement at the closing edge deserves attention. Surface molding marks belong in a separate cosmetic discussion; for a customer-facing kit, approve a visual reference before deliveries begin.
Inspect hardware as part of the system
Open and close every latch until the first impression wears off. Lift from the bench, then from the floor. Put another case alongside and see whether fingers still clear the hardware. If wheels are fitted, load the box before trying the threshold and corner.
Ask which components are replaceable. A body that lasts for years is less useful if a worn wheel or latch cannot be serviced within the project’s maintenance plan.
Review weight, balance and storage
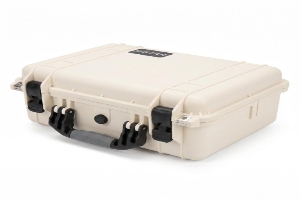
Do not compare empty weights and stop. Add the insert, equipment, accessories and any outer package. The operator experiences the loaded assembly.
The scales may show equal mass while the hand reports otherwise. One handle sits off the balance point; another turns the wrist. Carry each sample along the shortest real route and include the stairs.
Check stacking and unused storage
Build the proposed store stack with loaded samples. Then remove the contents and decide where the empties wait. Feet, corner pieces, wheel housings and lid shape—not the broad material label—determine whether the stack stays orderly.
Record the orientation and any supplier-supported load. A lid that looks flat has not volunteered to hold a tower.
Include vehicle and freight limits
Carry the outside dimensions to the shelf, vehicle opening, doorway and pallet plan. An air shipment also needs the carrier’s current rules applied to the complete package.
Those few outside centimetres may alter storage or freight while a small empty-weight saving changes nothing. Keep a route sketch next to the internal packing drawing so the two questions do not blur.
Separate environmental claims from material choice
Neither material arrives with a universal promise about water, dust or temperature. Those claims belong to an identified case or finished assembly under stated conditions.
When ingress matters, the evidence must name the proposed model. On the sample, check how the seal sits, where the latch pulls and whether a valve or new connector opening changes the enclosure. The IP65 vs IP67 guide explains why jets and temporary immersion are different exposures.
Consider surface wear and cleaning
A metal-panel dent and a scuff across textured plastic tell different visual stories. The team should decide which marks are normal workshop history and which fail the presentation requirement.
Clean both samples with the proposed method and include labels in the trial. Solvents and disinfectants call for compatibility guidance covering the actual finish and components; a one-word material description will not do.
Watch for dissimilar requirements
Some projects introduce bonding, static, heat or radio questions. Write the required function instead of guessing from the shell material, then bring in the specialist responsible for that requirement.
Keep such requirements separate from general transport protection. This makes evidence and responsibility easier to review.
Decide how much customization is really needed
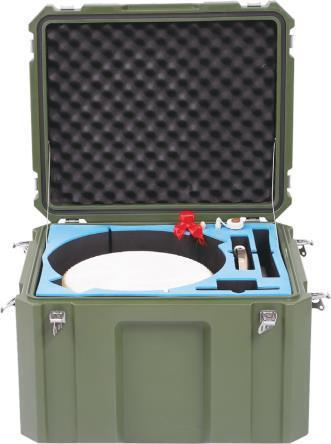
Both families can receive foam, markings, color and fitted parts, but not by identical methods. Circle the customization that matters. It may be only the interior, or it may extend to a panel, branding or the outside shell.
Open the aluminum cases category and plastic protective cases category with the layout dimensions beside you. Molded examples such as YF-463546 and YF-504836 can narrow the envelope. A photograph remains a size-and-format reference, not performance evidence.
Send the same brief with each enquiry. Put quantity, programme life, drawings, route, branding, packing and evidence on separate lines. If an existing shell already solves the outside problem, spend design time on the interior and interfaces.
The last comparison happens with both samples loaded. Carry them, operate the closures and try their assigned vehicle and work positions. Keep each observation with the correct unit in the sample review guide. Only then write the material decision.
FAQ
Is an aluminum case lighter than a plastic case?
No. Size, construction and hardware all change the number. Weigh representative empty samples and repeat with the same kit and interior.
Which material is more waterproof?
Neither material proves it. Ask for evidence naming the model, finished closure and any opening added during customization.
Can both cases use fitted foam?
Yes. Design the insert around the complete equipment set, usable interior and handling route. Confirm depth and lid clearance on a sample.
What is the best first comparison document?
Use one brief listing equipment, internal and external limits, route, exposure, quantity, customization and acceptance evidence. Send the same brief for both options.