
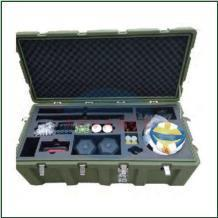
An aluminum carrying case with foam should be specified as one packed system. The shell has to fit the route, the insert has to support the complete kit, and the finished case has to remain practical to lift, open and repack. Choosing the outside first and asking for “foam inside” later often produces avoidable compromises.
Begin with the equipment rather than a case catalogue. Record every item, its transport condition and the order in which users need it. Then compare that packed layout with the usable interior of an exact case model. Nominal volume and an attractive exterior cannot answer questions about corner clearance, lid depth or finger access.
Build the equipment list before selecting a case
Place the full travelling kit on a clear surface. Include the main instrument, leads, chargers, batteries, adapters, tools, documents and spares. Give each item a code so the list, photographs and drawing refer to the same object.
Record the maximum length, width and height of every item in its transport condition. Fold handles only when the packing instruction will require that position. Keep protective caps, guards and boots attached if they travel with the equipment.
Separate fixed and changing items
Some items remain stable through the life of the case. Others change with each job. A meter or instrument may justify a fitted cavity, while consumables may be better in a removable tray or documented flexible zone.
Mark this distinction before the layout starts. Cutting a precise cavity for an item that changes every month creates an early revision problem. Leaving the entire interior unstructured makes it harder to notice missing or misplaced equipment.
Record weight and sensitive areas
Weigh dense items individually and calculate the complete packed mass. A small metal component can affect support and balance more than a larger hollow accessory.
Identify displays, connectors, vents and calibrated controls that should not carry pressure. Also mark surfaces that can safely receive support. This gives the insert designer positive information instead of a vague request to make everything soft.
Translate the kit into a foam layout
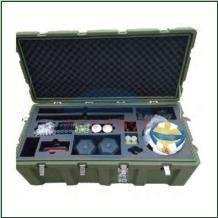
Arrange the coded outlines on paper or in a scaled drawing. Keep related tools together and place frequent-use items where they can be reached without unloading the case. Show cable coils and accessories at the size operators will actually pack.
The custom foam inserts guide compares flexible pick-and-pluck interiors with repeatable CNC-cut layouts. The right process depends on the equipment, quantity, revision risk and appearance expected from the finished kit.
Add grip and removal clearance
An exact trace does not guarantee that an item can be lifted. Mark where a thumb, fingertip, gloved hand or pull ribbon will enter. Test the motion at the height where the case will normally be opened.
Deep cavities need particular attention. A user may reach the top of an instrument but still be unable to lift it without pulling on a connector or screen. Removal clearance belongs on the drawing, not in a verbal note added after the first sample.
Plan the vertical stack
Build the height from the bottom upward: base support, equipment, any tray or divider, and the lid-side material. Record which surfaces may touch and which must remain unloaded.
Usable depth is more important than a broad external height. Hinges, rims, panels and lid components can reduce the space available to the layout. Close the packed sample with normal hand pressure; a latch that suddenly needs unusual force may be reporting interference.
Keep allowances separate from measurements
Do not hide an assumed foam allowance inside the equipment dimensions. Record the measured object as measured, then show cavity clearance, spacing and manufacturing allowance as design decisions.
This separation protects the source data when the insert changes. A supplier can revise a cavity without losing the original equipment envelope or confusing it with an earlier design choice.
Check the aluminum case construction as a system
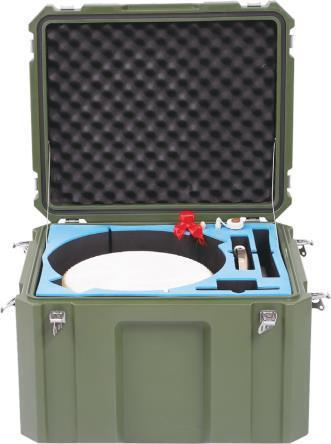
“Aluminum case” describes a broad family, not one construction. Compare the exact body, panels, frame, corners, hinges, handle and closures. Ask for the current specification of the proposed model instead of extending a claim from a similar-looking case.
The aluminum case category provides a starting point for format discussions. Use the equipment list and route to narrow the choice, then review the selected production-representative sample.
Inspect panels, joints and edges
Look at panel support, corner details, joints and finished edges. Open and close the lid several times with the intended insert and load in place. Confirm that hardware does not interfere with the foam or the equipment.
Cosmetic expectations should be written down as well. A workshop case and a customer-facing demonstration kit may use different acceptance standards for scuffs, marks and visible hardware.
Test the handle and closures under load
Load the complete kit and lift the case slowly. Watch the handle mounts, frame and closure area for unexpected movement or interference. Carry it over the real route, including stairs, doors and vehicle loading where those apply.
This handling review is not a formal load or drop test. If a rated performance is required, request evidence for the exact case and configuration. Do not turn a comfortable sample carry into a published load claim.
Treat environmental protection separately
Material and appearance do not establish an ingress rating. If dust or water exposure matters, describe the event and request model-specific evidence for the closed configuration.
Panels, ports or custom penetrations can change the finished assembly. Put responsibility for the completed configuration on the drawing and order record rather than assuming that an unmodified case claim still applies.
Compare the aluminum option with nearby formats
An aluminum carrying case may suit presentation, organized transport or a defined equipment kit, but the route should decide. If the job needs another enclosure format, compare it openly rather than forcing the original choice.
The plastic protective case category and rotomolded case category provide alternative starting points. Model pages such as YF-463546 and YF-504836 can help buyers compare overall formats. They are not aluminum-case equivalents and do not prove performance for another model.
Compare the complete packed result
Use the same equipment list and acceptance criteria for every candidate. Record external size, usable interior, packed mass, access, balance, vehicle fit, maintenance and evidence.
The existing aluminum case vs plastic case guide helps structure a material comparison. Keep the decision tied to exact samples because construction details often matter more than a category label.
Approve the drawing and packed sample
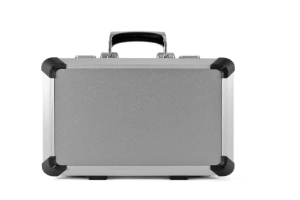
The supplier package should include the coded equipment list, measurements, weights, photographs, preferred arrangement, sensitive areas, branding, quantity and destination. Give the package a revision and require the drawing to quote it.
When the sample arrives, tick every item code against the drawing. Load, carry, open and repack the case. Invite someone who did not design the layout; hesitation or a wrong reach can reveal an access problem that has become invisible to the project team.
Use the sample review guide to record fit, closure, handling, appearance and open questions. The custom case enquiry guide can then keep the approved configuration, branding and order requirements together.
FAQ
How thick should the foam be in an aluminum carrying case?
There is no universal thickness. It depends on the equipment, support areas, packed mass, cavity layout, available depth and risks defined for the route. Keep the final choice tied to the supplier drawing and sample.
Should every item have its own foam cavity?
Not necessarily. Stable and sensitive items may benefit from fixed positions, while changing consumables can use a documented flexible zone, tray or removable module.
Does an aluminum case automatically protect against water?
No. Material and appearance do not establish an ingress classification. Request evidence for the exact closed model and any completed custom configuration.
What should buyers test before approving the case?
Check every listed item, removal access, lid clearance, closures, handle comfort, packed balance, route fit, vehicle storage, appearance and repeatable repacking.